Data retention is a governance control that allows a System Admin to govern what data is kept and to purge data that meets the criteria of the data retention policy.
To learn more about data retention, check out the information below.
To learn more about Smartsheet Regions, click here.
Plans:
Permissions:
Find out if this capability is included in Smartsheet Regions or Smartsheet Gov.
Governance controls allow System Admins to customize their organization’s compliance and data governance requirements. These powerful controls provide expanded governance capabilities that make it easier for System Admins to set and enforce policy restrictions. The policy templates are easy to use, with step-by-step guidance.
Data retention is a governance control that allows a System Admin to govern what data is kept and to purge data that meets the criteria of the data retention policy.
To learn more about data retention, check out the information below.
Who can use this?
Plans:
Permissions:
Find out if this capability is included in Smartsheet Regions or Smartsheet Gov.
A Smartsheet Advance Platinum subscription or Advanced Work Management plus Safeguard is required to enable Governance Controls.
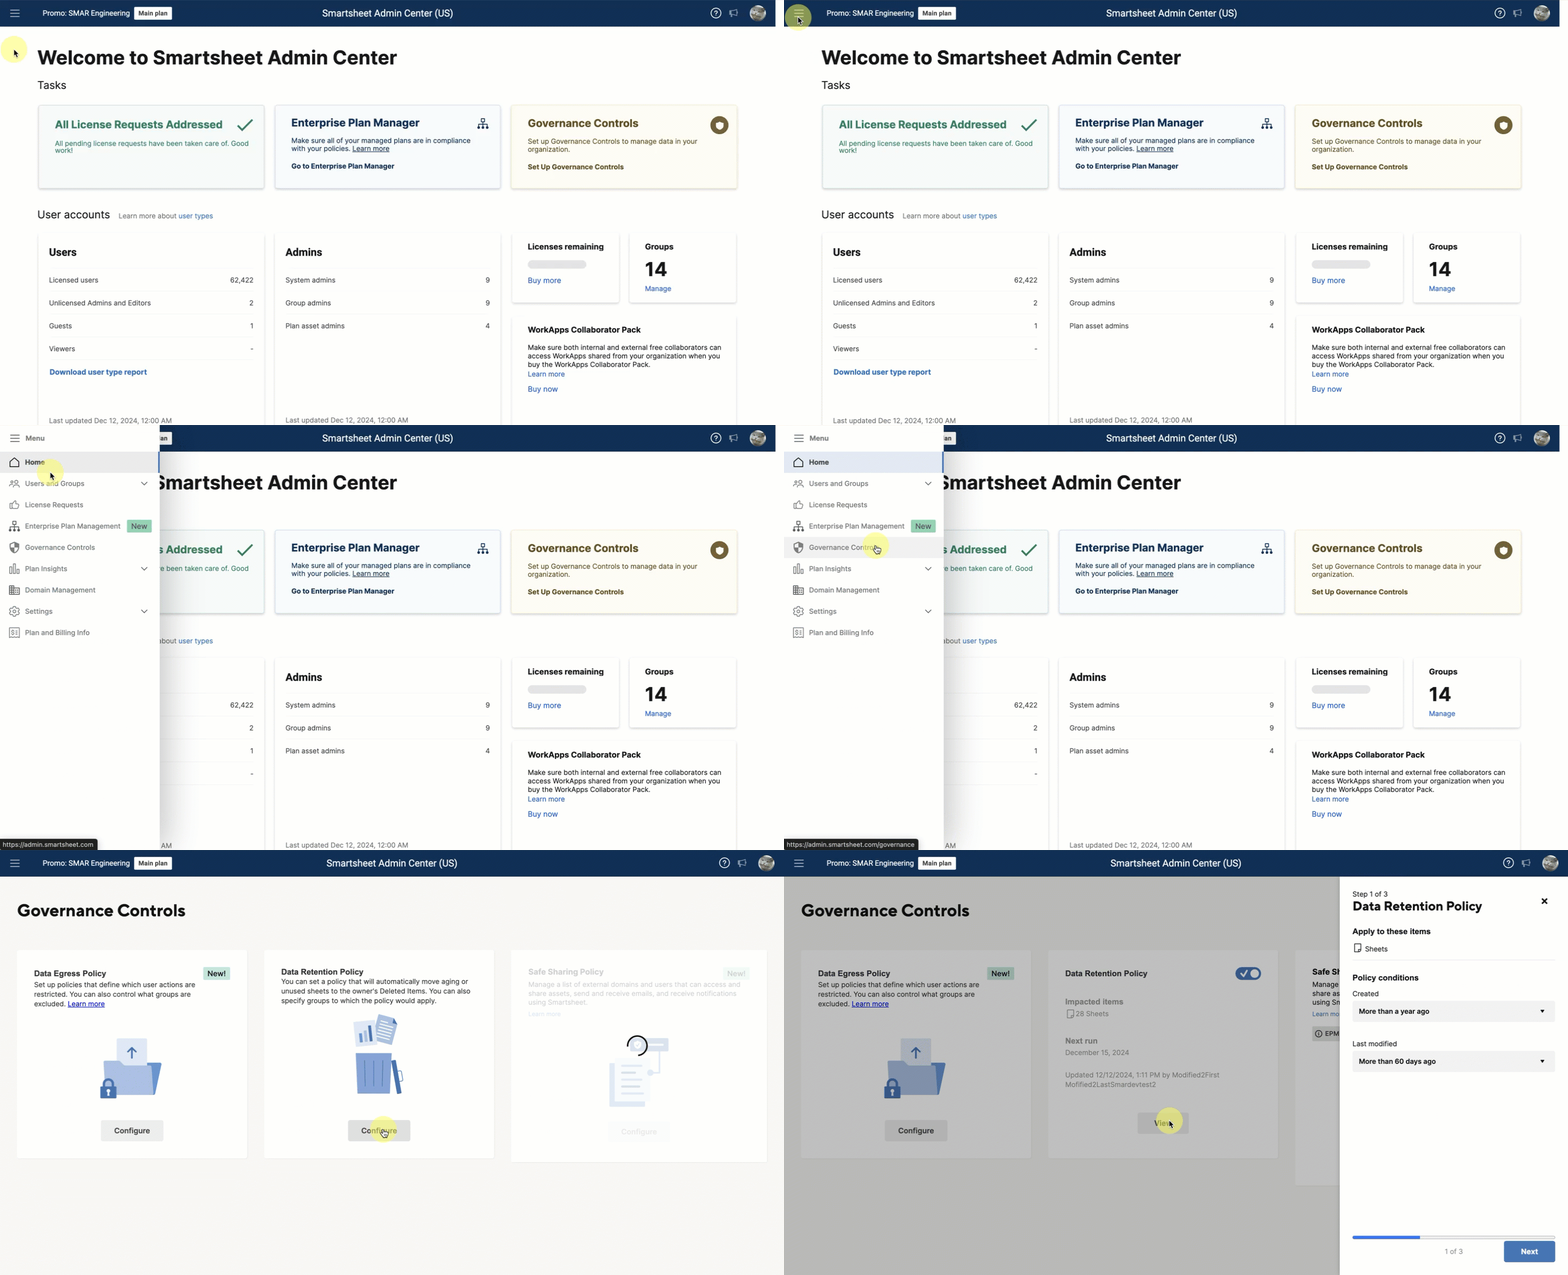
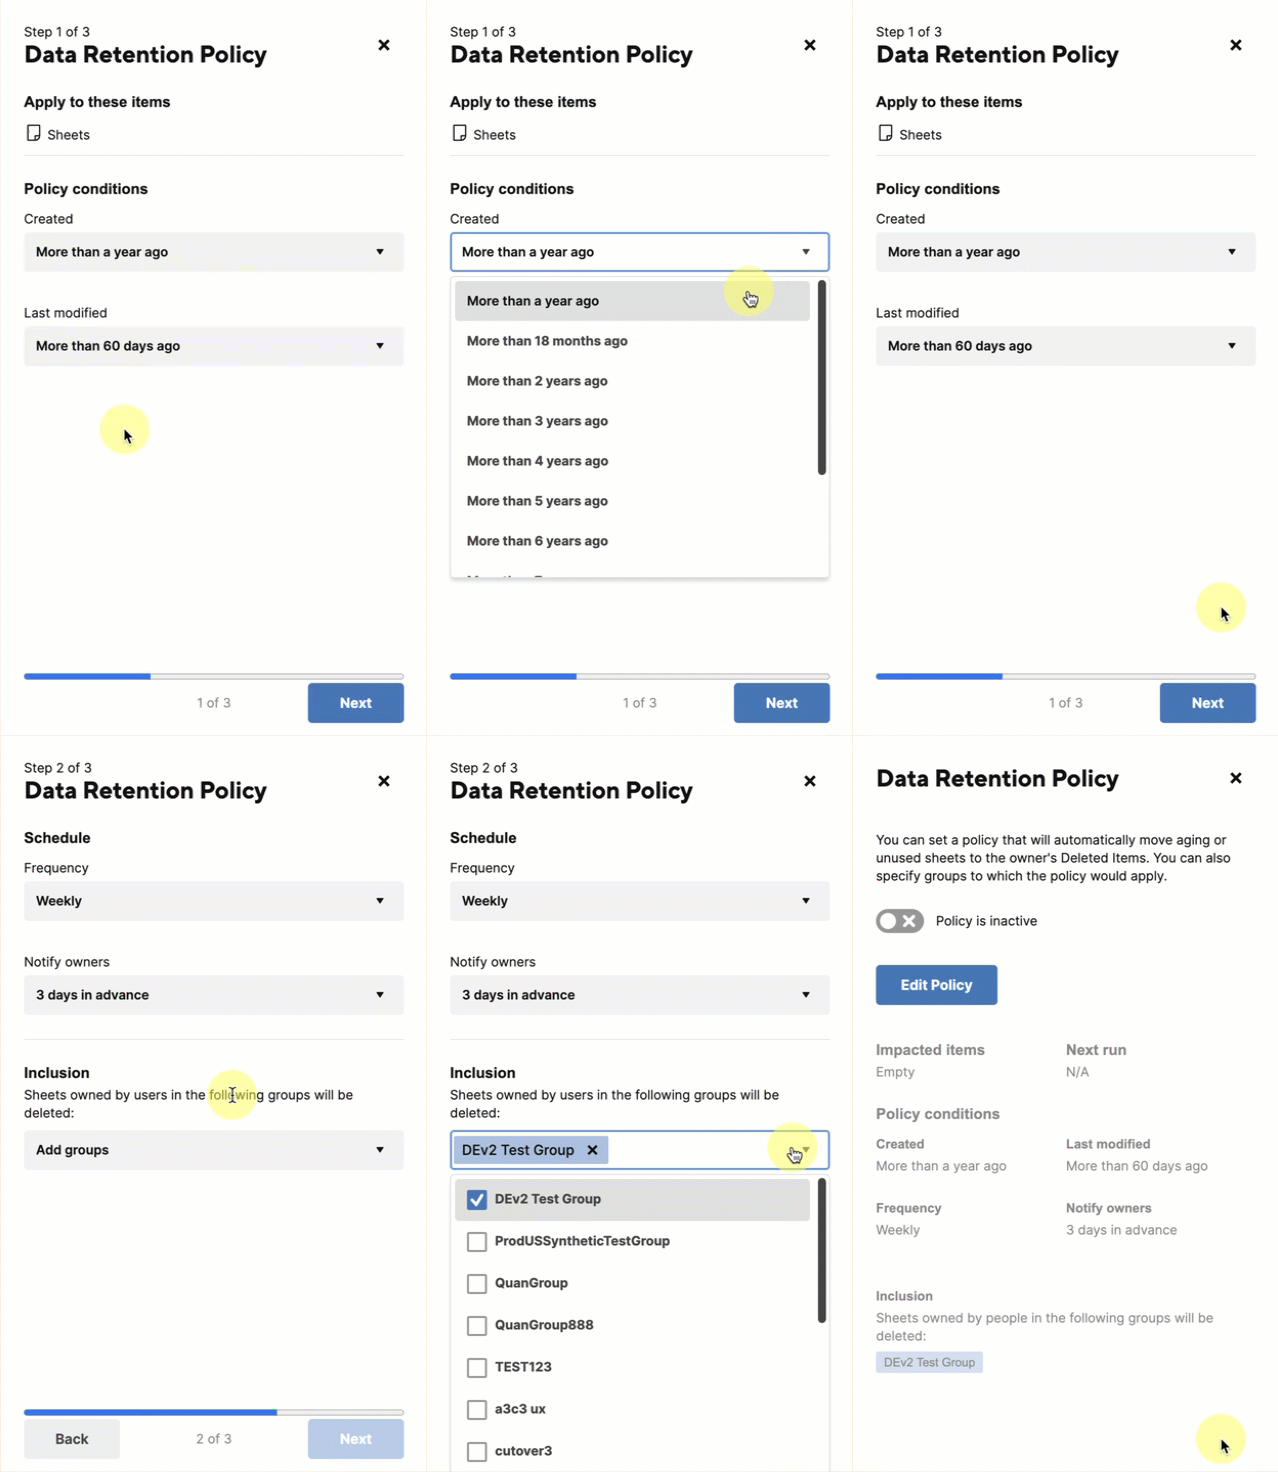
Visit the Governance Controls page in Admin Center to set your data retention policy, governing what data to keep and purge.
You can only create one policy, but you can assign as many inclusion groups to that policy. As of now, the policy conditions only support sheets and their attachments. When enabled, the policy can apply retroactively to sheets older than a specified created on or last edited date.
Once you configure and activate your data retention policy, it runs in the background to ensure any data retained meets your compliance requirements.
If the scan discovers sheets and/or attachments that don't comply with your policy, sheet Owners and Admins in the inclusion group are notified that their data isn’t compliant and will be deleted if they don't take action.
If they fail to take action to bring their items into compliance, they’ll receive an additional notification informing them of the deletion when it's complete.
Notifications regarding potential removals will be sent to users with Admin and Owner permissions on the item as long as they're part of the data retention policy’s inclusion group. Those with Admin permissions on the item who aren't included in the group won't receive any notifications.
Select Data Retention Policy > Configure.

Select Save & Turn On to activate the policy.

You can enable or disable your policy at any time from Governance Controls.
When you update the policy, the scan runs as scheduled in the update. Any change to the policy restarts the time frame and adds (or removes) any included groups.
You can edit or deactivate your data retention policy, but you can't delete it.
Owners and Admins can recover sheets before the policy permanently deletes them.
To restore an item deleted by the data retention policy:
Doing this ensures the item is excluded from the evaluation list for permanent deletion.