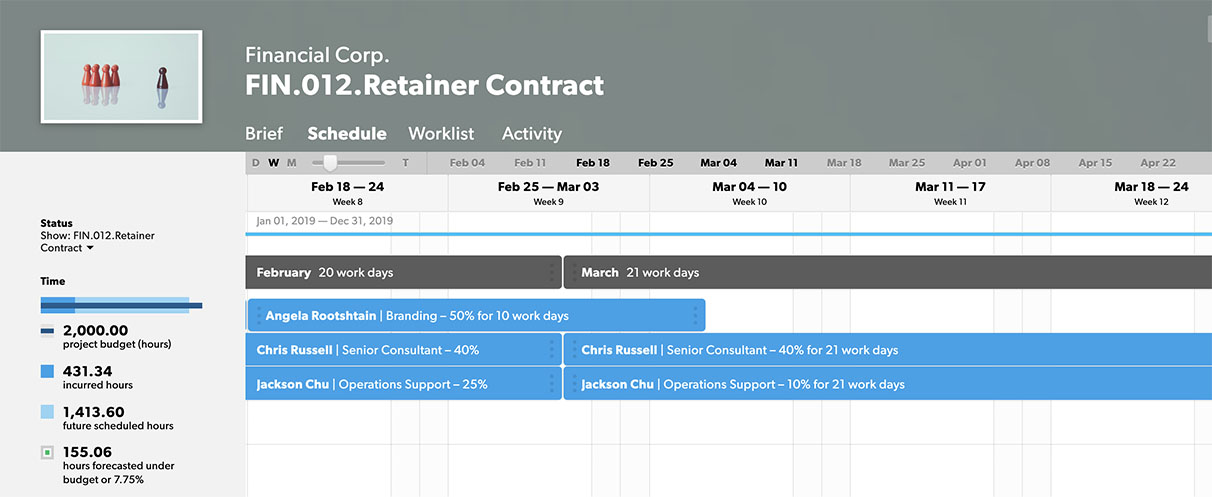
The project schedule is an interactive view of each project's plan.
You can edit the project timeline and any associated assignments. You can create phases and assignments, and see the impact of those changes on the project's time and fee status.
By default, the schedule auto-zooms to fit the length of your project. Use the sliders at either end of the phase or assignment bars to change dates.
Brandfolder Image

Adding items to the project schedule
To add phases:
- Click the schedule where you'd like the phase to begin and then select Add Phase.
- Choose from one of the default phase names, or create a new phase name. The phase automatically extends to the end of the project, but you can edit it as needed.
To add assignments:
- Click anywhere on an empty date slot or phase and then select Add Team Member.
- Select a team member from the list. You can also choose a placeholder if you don't have a resource in mind. The assignment starts on the current day (or the project start date if it’s in the future) and extends to the end of the project or phase, but you can edit it as needed.
To add descriptions of work:
- To add work to an existing assignment, click on a team member's assignment and then choose Work Item. Enter your details in the text box.
- To add a description of work when without assigning it to a team member, click anywhere on a blank portion of the schedule and select Add Work Item. Enter in text to create a new work item that starts on the current day (or the project start date if it’s in the future) and extends to the end of the project.