Featured slides and announcements can help your team stay on brand when creating collateral.
Create & publish featured slides
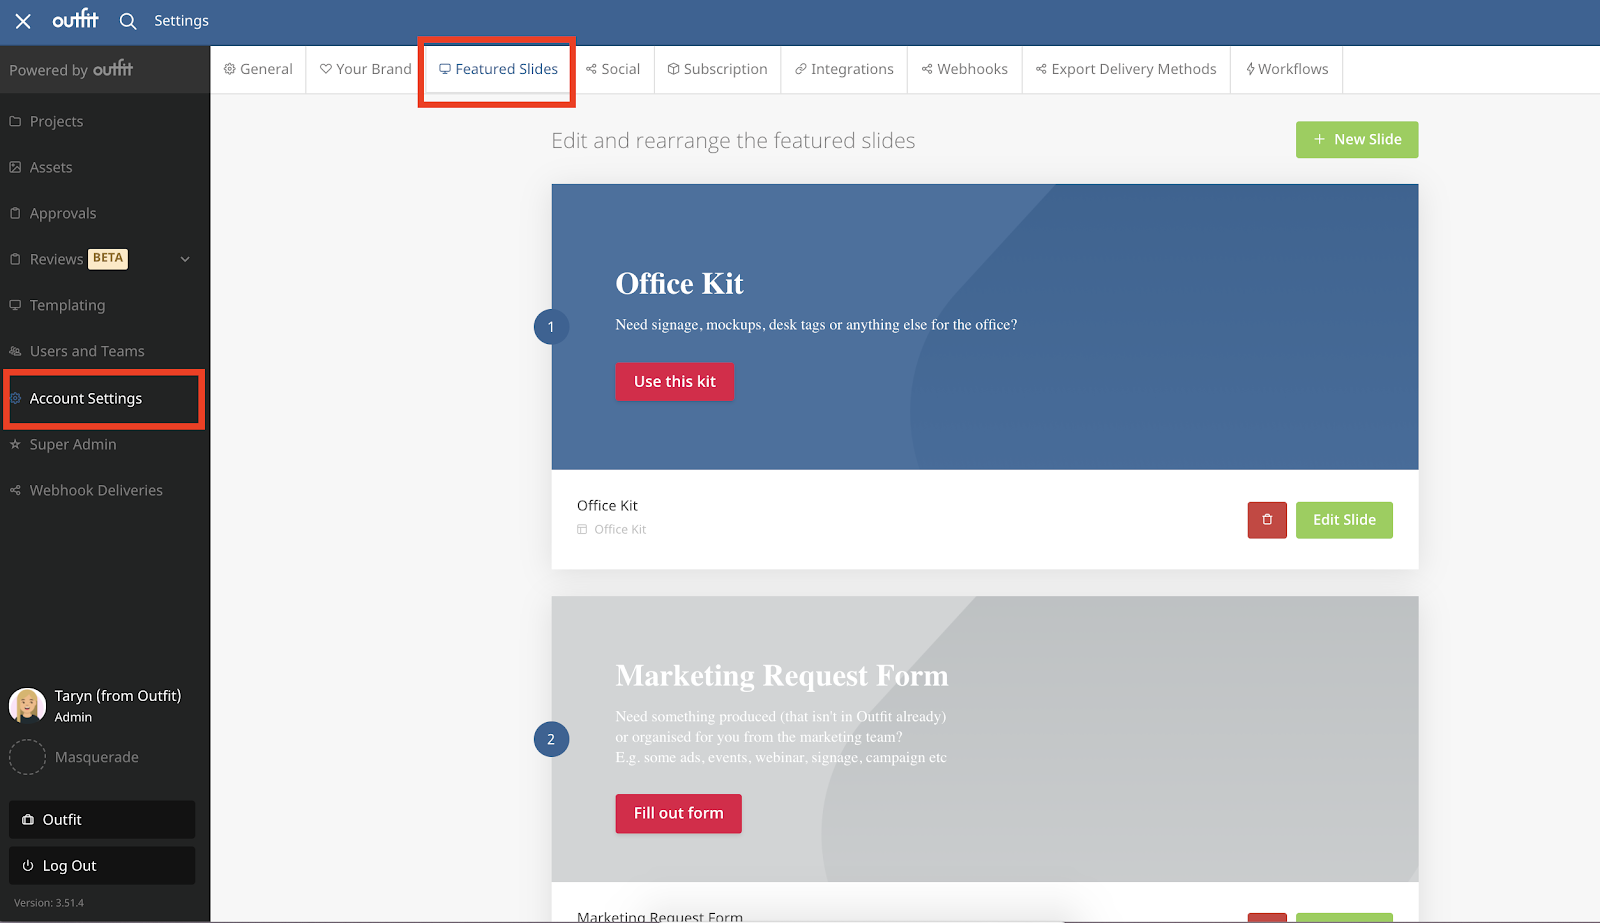
1. To create a featured slide, navigate to Account Settings > Featured Slides.

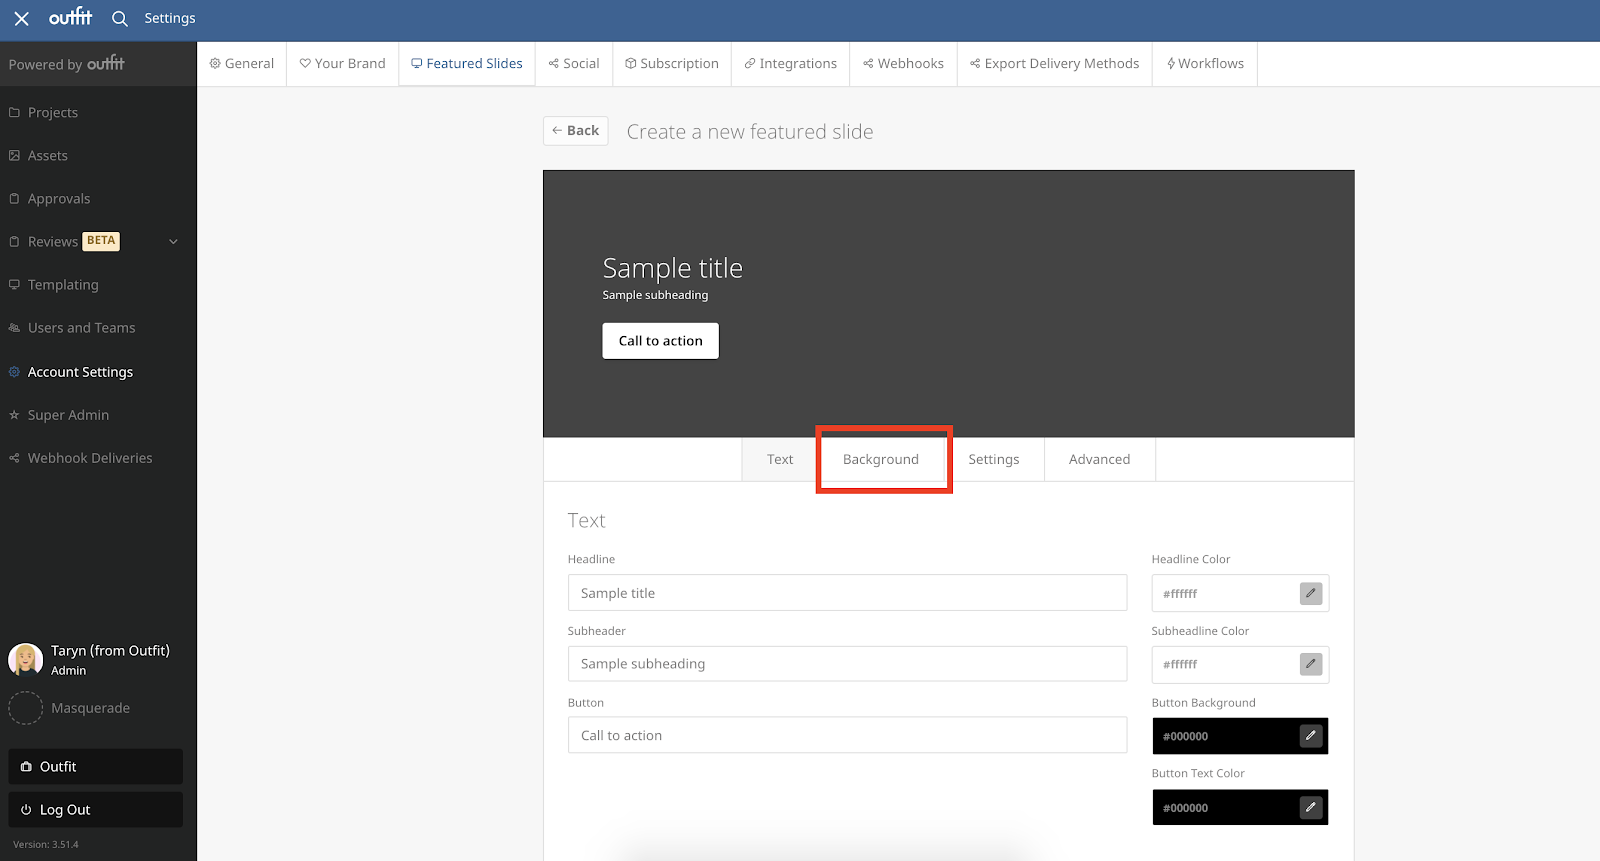
2. Select the green + New Slide button to create a new featured slide.
3. Enter the copy for your headline, subheader, and button.
4. Use the color selection tool to customize the color of your headline, subheader, button background, and text.
5. Select the Background tab.

6. Either enter a background image or a background thumbnail. Or, alternatively, select a background color using the color selection tool.
If you are creating your featured slide banner outside the Content Automation platform, we recommend using an image that is 1920px wide and then a consistent height for all your slides (usually around the 300 - 500px range).
7. Customize the blend mode and background permission.
8. Select the Settings tab.
9. Customize whether you want the button on the featured slide to go to a project kit, training article, or URL, and fill in the relevant selection for each.
10. Customize the featured slide's visibility by leaving it as the default for all teams or selecting one or more teams.
11. Toggle the featured slide to published once you are happy with the customization.
12. If you want to customize the featured slide further, select the advanced tab.
13. Customize the CSS for the heading, subheading, and button.
Create and send out an announcement
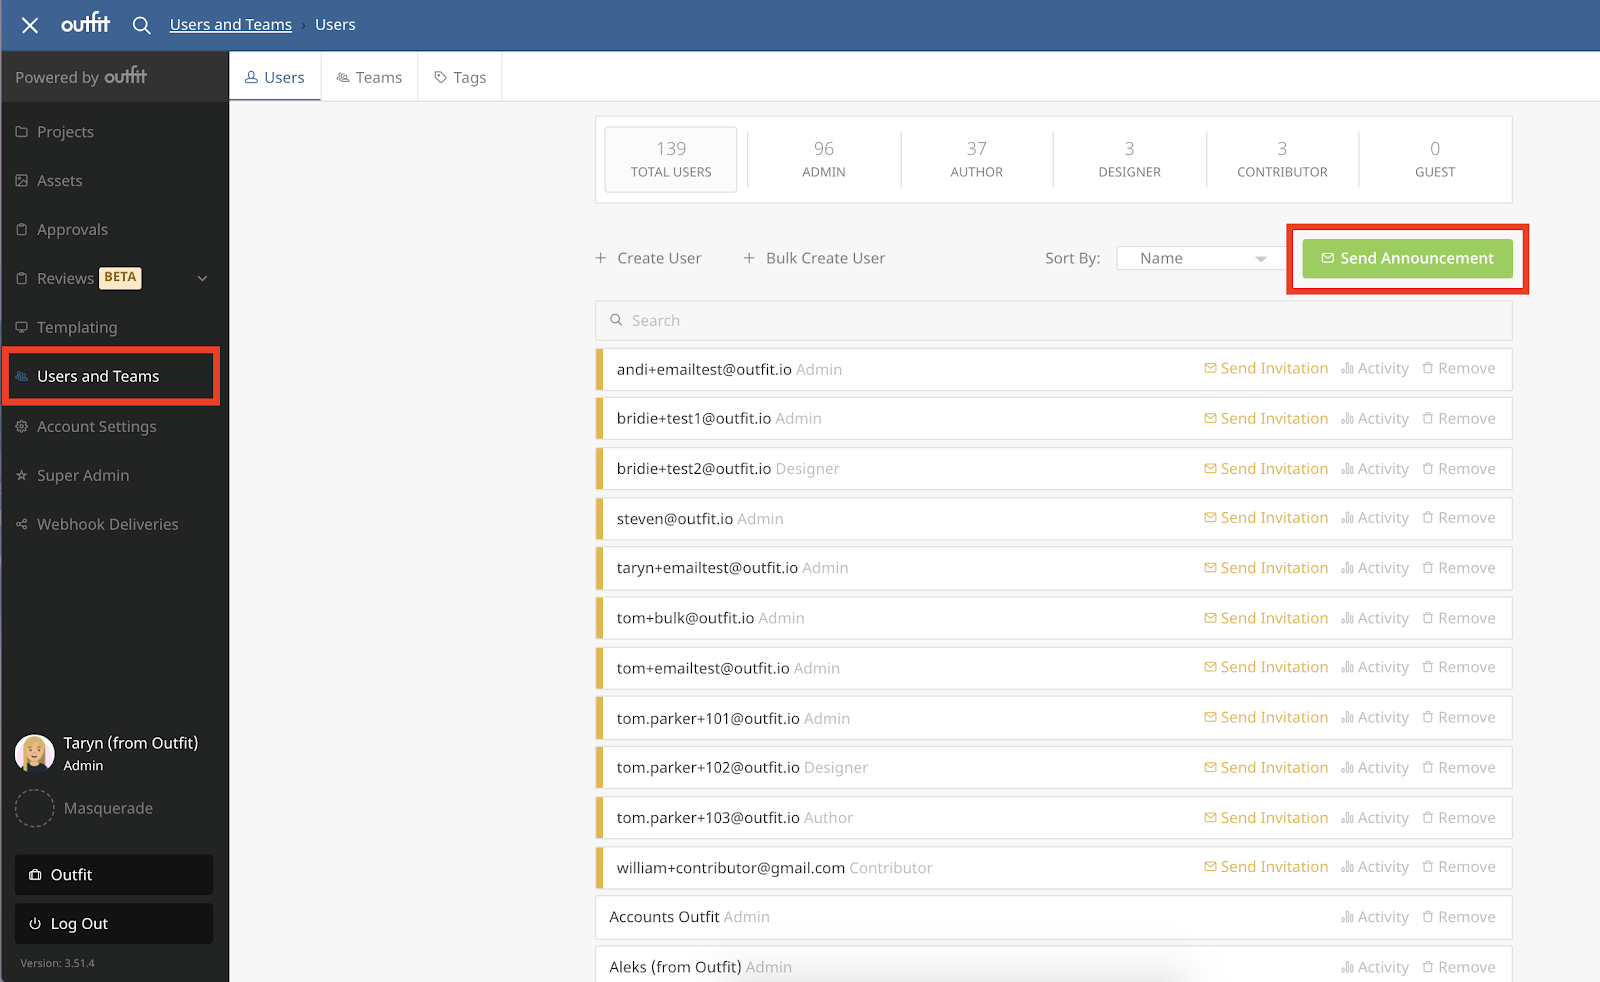
1. To create an announcement, navigate to Teams and Users and select the green Send Announcement button.

2. Compose your announcement subject line and body copy, and use the formatting options available.
3. Customize the audience of the announcement by either leaving it as the default for everyone or unchecking the box to select specific users or teams.
4. Select Send once you wish to deploy your announcement.