Use these best practices and troubleshooting tips to fix errors and get the most out of using Smartsheet for Dynamics 365 Connector.
Find and fix sync errors
You can use the following resources to find and resolve workflow errors:
- The Run History page: Provides a count of the number of sync errors for a workflow and displays an error message with the issue details.
- Error Report Emails: When issues occur, the workflow owner and the person who edited the field or workflow row that caused the issue receive an email.
- Sync Error column: In Smartsheet, a message populates on rows with a sync issue. (This column should exist on any sheet associated with a Dynamics 365 entity).
Use the Run History page to troubleshoot sync errors
After creating a workflow, you can see the workflow’s Run History page to review its sync history and any errors that occurred.
To get to the Run History page:
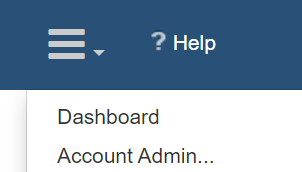
Select Dashboard from the menu to view the list of workflows.
Select the link under Last Run to see a workflow’s Run History page.
Select a specific run instance's timestamp (under Last Run) to see any error messages.
Connectors workflow best practices
Save and refresh often
Working across two applications increases the chances of synchronization errors. To help minimize this risk, save changes and refresh your sheets as you make updates. This ensures that others see your changes and they’re synced to Dynamics 365 and Smartsheet according to your workflows.
Give Viewer permission on sheets
To prevent accidental changes to the sheet that could cause sync issues between Smartsheet and Dynamics 365, you can give Viewer permissions to collaborators on your sheet. This way, collaborators can see the sheet data but can't make changes.
View changes
Use the View History feature to see a record of changes made to a cell. For sheets that include data shared between Smartsheet and Dynamics 365, the name of the user associated with the change is the person who created the workflow.
This information can help isolate a specific user’s workflow if you find unexpected changes. They could be from incorrectly mapped columns or if you’re not receiving errors in the Sync Error column.
Push data from Smartsheet to Dynamics 365 for specific rows only
To have control over which rows explicitly push data back to Dynamics 365:
- In the sheet you want to connect to the Dynamics 365 entity, create a new column, select the Checkbox type, and name the column Sync to Dynamics.
- Log in to the Smartsheet for Dynamics 365 page, and follow the steps to create a workflow.
- In the workflow wizard, specify a bidirectional workflow and create filters to sync only rows from the sheet with the Update in Dynamics 365 column checked.
The next time the sheet and the Dynamics entity sync, data gets pushed back to Dynamics only for the rows for which the Sync to Dynamics checkbox is checked.
Check sheet permissions on unexpectedly blank columns
Data may not update to a sheet depending on your sharing permissions, but you may not receive an error. If a column appears blank on a sheet you’ve mapped in your workflow, the column may be locked, and you would need Admin permissions on the sheet.
